Friday, April 30, 2010

365 Cards Day 61

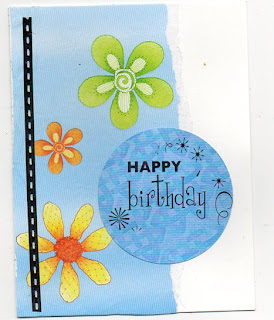
We're heading out of town for the weekend so I'll have to do the weekend cards when we get back... but I whipped up today's card this morning. Good thing it was a fairly simple challenge. :)
Today's Challenge is to use circles (at least) three ways... my card has six!
A lot of people made a circular card today but I didn't have time to mess around with templates so I made a regular card and used the following:
  • printed card with circles
  • Punched border with a circular pattern in it (and more printed circles but they don't count seperately)
  • Fabric sentiment
  • Ribbon with circles on it
  • Jumbo circle brads
  • and lastly, tiny circular diamantes.
Don't forget to get your cards in for the Operation Write Home 'Make Someone's Day' Challenge - the deadline is May 10, so there's not much time left... they have five great prizes to give away, and of course the cards are for a great cause. Just follow the link for directions and the all-important mailing addresses.

Thursday, April 29, 2010

365 Cards Days 57/58/60

I posted day 59 yesterday, so here are the other challenges...

Day 57 - Ad-inspired
Make a card inspired by this adorable baby quilt/s... I didn't really want to make another baby card because I just made one of them yesterday, but I've got a cute turtle on my Cricut Stretch Your Imagination cartridge, so I made a romantic card with that. The little bow was on the cartridge as well, I just had to figure out what size to make it... and I cut the mini bow tie by hand.

Day 58 - Crazy Eights. Make a card with at least three multiples of eight on it .
My card has eight colours striped on the background (there were seven colours on the printed paper and I added a strip of yellow to make eight), eight petals on the flower, and eight golden gems in the center of the flower. I didn't want to over-complicate the design with that many colours in it, so I kept the flower very simple.

Day 60 - All that Glitters. It's another glitter challenge - use three colours of glitter on your card. I can't use loose glitter for Operation Write Home, so rather than skip this challenge I've fallen back on paper with the glitter safely embedded in acrylic where it can't flake off and be a danger to anyone.
My card was inspired by the gorgeous glittery giraffe in the 'Nana's Nursery' Baby Boy stack. It had blue glitter and creamy-coloured glitter, so I added a sheet of orangey-yellow glitter cardstock, and then to make sure I had enough glitter, I finished it with a little silver sticker flower with glitter embedded right in the foil. Isn't the giraffe sweet? This card does double duty - it also fits the Wednesday Challenge over on Stars and Stamps - do the Wild Thing... and so for that matter does my kissing turtles card above!

Speaking of Challenges, Operation Write Home is holding a 'Make Someone's Day Challenge' and they have five prizes to give away...  simply send in an envelope of general purpose cards (love you, miss you, thinking of you etc.) and include two Any Hero cards with a brief note of encouragement in them. The deadline for this challenge is May 10th, so if you're interested, get hopping! There's no minimum number of cards  to send... so anything over four would count. :) I'm going to Orlando for the weekend, and I've got a bunch of cards made... hopefully I'll be able to make it to the post office tomorrow.

Wednesday, April 28, 2010

365 Cards Day 59 - Moving Parts

Today's challenge was to make a card with moving parts on it... that was a bit of a doozy for me! I don't have any stamps suitable for moving arms or legs... I rummaged through my sticker collection and came up with a baby buggy. I punched new wheels for it from cardstock and mounted them on little stubs of folded up cardstock with brads. You'll have to take my word for it becuase they look the same both ways up, but the wheels turn if you push them. I have another idea I want to try involving a flag, string, and a flagpole, but it's way too late at night to attempt that just now.

Sunday, April 25, 2010

365 Cards Day 55/56

Day 55 - On Pins and Needles.
Incorporate a decorative pin/s and use a needle to stitch on your card. I used a sewing notion of some kind for my pin (I have no idea what it's meant for but it's been lurking in my sewing box for years and it's cute!) and I emboidered the flower stem for my silk daisy. I also used an embroidered ribbon to finish the card.


Day 56 - Super Sketchy Sunday
Sunday already? Yep! And for once I'm doing Sunday's card actually ON Sunday. I used some bits and pieces from my diecut box, and a recycled picture from an old art book.

Way-back-machine Week 2

Day 35 - Super Sketchy Sunday (Easter Sunday)


Day 36 - I quilt sketch challenge
The middle part of this design reminded me of an envelope... so that's what I used! I finished it with stickers...

Day 37 - Terrific Taggies (ribbon tags)
When you have lots of ribbon the card doesn't really need much else... I may add something else to the border.

Day 38 - Acrostic poem

Day 39 - Totally Transferred (rubon card)
I actually made this one at the correct time but never got it uploaded. I don't use rubons much because I always have troubles getting them to stick! The flower rubons were a pleasant exception. They stuck like a charm. Everything on the card except the patterned paper is a rubon.

Day 40 - Friday Five.
Use the following ingredients:
  • 5 colours (pink, purple, green, yellow, white)
  • 5 buttons
  • 5 patterned papers
  • 5 stamps (4 leaves and 1 sentiment)
  • 5 blossoms
    Day 41 - DIY glittered blossoms/Day 42 - Super Sketchy Sunday
    You're not allowed to use loose glitter on cards for Operation Write Home because it's a safety hazard, so I cut my blossoms from glittery cardstock instead. There's plenty of glimmer, but it's safely embedded under acrylic. I combined this challenge with the next day's sketch. 

    Saturday, April 24, 2010

    365 Cards Days 53-54

    Scroll down for a one-week catch-up entry. Another one is coming because I've got another whole week to catch up! But now here's the last few days' cards.

    Day 53 - Front, Back and everything inbetween
    I don't usually decorate the inside of my cards, so I had to think hard about this one! I kept it simple and used a recurring jigsaw piece theme on the pages....


    Day 54 - Fancy Folds

    The example for this was a square card... but I cut the design down to size and used a regular-sized card to make a mini-version. I used a nice printed card for the front and cut a panel off the front, and I folded a 4x6 cardstock mat in half to make the inside panel (I folded it backwards so I'd have the white front to decorate and you can see the printing when you open the card, but it's still light enough to write on with a black pen.  I echoed the printed flowers with a 3D flower to hold the front panel closed.

    Friday, April 23, 2010

    Getting in the way-back-machine 28-34

    I missed out on two weeks of 365 Cards because of my hand (Days 28-41)... and I want to try to catch up and do some of them if I possibly can, even if just in a very simple form. I'd love to be able to look back at the end of the year and say 'I did ALL the challenges'!

    Day 28 - Super Sketchy Sunday

    The tag and 'ribbon' are from a page kit. Flower stamp is Heidi Grace, Ink is Circus Rainbow.
    Day 29 - A certain sentiment. 'Hang in there'. I used a pre-printed card base, sticker lettering, and a recycled image from a children's picture book. I crumped and inked the background paper.

    Day 30 - In Pieces - Use an image on the front of your card and then in a different form on the inside. This is actually an old tissue box... finished with punched butterflies and a little pen. The smudge is on the scanner, not the card.
     Day 31 - All Mixed Up.  Take an image (digi, stamp, etc.) and break it down into thirds - 1/3 no color, 1/3 patterned paper, 1/3 hand colored (markers, colored pencils, chalks, paint, etc.). I used an Inkadinkadoo stamp for this - I stamped it on patterned paper then twice on plain white. I coloured in the central heart on one image and layered all three...


    Day 32 - Recipe Card (pocket card to put a recipe in) Another cute Disney card... the honey seemed appropriate for a recipe card, and I made a 'brick wall' pocket on the inside to hold a sheet of paper to write on.

    Day 33 - Whip Stitch It - sew around three sides of your card.

    I used a wallpaper diecut somebody gave me and turned it into a pocket card... with a tag that slides out. The pocket embellishment was from a swap.

    Day 34 - Colour scheme. I used a combo of stamps... an unmounted rubber vine, Heidi Grace daisies, and a Basic Grey butterfly.

    And that's the first week I missed!

    Wednesday, April 21, 2010

    365 Cards 49-52

    Last night I was so tired I went to bed at ten o'clock... which of course led to my being wide awake at three in the morning. After staring at the ceiling for awhile, I got up and started work on the cards.

    Day 49 - Super Sketchy Sunday.
    I made a straightforward flower card to use up some of the silk flowers in my stash. There's a wide ribbon in there but you can't see much of it! The card background was gently direct-inked on a large stamp pad.

    Day 50 - Digging Deep.
    Find three things in your stash -
    1) An item that is more than a year old
    2) Something that you were given that you have never used - this could be from a swap or a gift, but it has to have come from someone else.
    3) Something you forgot you had.


    I rummaged through my 'miscellaneous' embellishment box to make this card. I bought the red box about four years ago at the Dollar Tree. The mini playing card was given to me so long ago I'd forgotten it was there... and the cherry brads were a gift last year. (the bank notes came from Party City...)
    I was going to make the sentiment something about 'never gambling on love' or love being a 'sure bet' but I wasn't thinking quite clearly enough at 3am to finalise it.

    Day 51- Tuesday's Trio.
    Use at least one of each of the following 3 items:
    Alpha Sticker - Stamp - Red
    This one was very straightforward. I shadow-stamped the background (ink the stamp and stamp on plain paper before stamping the card, and repeat...) A pretty floral ribbon (I'm trying to use some of my stash now it's out where I can see it!), a rubon, and assorted stickers. I've got tons of lettering but it's all random letters at this point, so it's a good thing I like the 'ransom note' look.

    Day 52 - Save the Date
    There is very little (I'd pretty much say NO) demand for Save the Date cards for Operation Write Home and I don't need any myself... so I stretched the terms a little and made a card that COULD be 'save the date' or it could be for a more general announcement. The picture is recycled from a gift book and I handwrote the sentiment.

    Monday, April 19, 2010

    My Craftroom - before cleaning!

    I thought I'd share my craftroom with you. Sometimes it's very tidy... but inevitably the piles of stuff encroach on the working space until I'm left with about one square foot of desk and all the rest is piles 'o crap. Add in the large grey furry cat who insists on keepind me company, and there's nowhere to work at all! Such is the state today, and I've vowed to redeem it tomorrow. But first, the honest before photos, taken just a few minutes ago.
    1. A view of the desk area, taken from as far back as I could manage to get. As you can see, right now there's more junk than space. Immediately after I took this photo a cat wandered across the desk, sniffed in disgust, and went away to find a flat surface with enough clear space to sit!

    2. The pile-o-junk stuffed in the corner of the room, with my paper cabinet and junk collection. You can see the edge of my card display on your left. As swaps and cards come in I hang them over the slats of my closest door. It's about time to cull the ranks and to make room for more - my door is full!

    3. The top half of my bakers' rack and paper storage area. The scrap paper, ribbon basket and card storage rack are the only part of the room I'm really pleased with atm!

    4. The bottom half of my baker's rack, and my filing cabinet. The bottom drawer holds personal files, and the top has my papercrafting magazines/books and my postcard collection, for want of any better place to store it.

    5. My Iris cart and paper tray, and some boxes-o-junk under the desk. Also some more of my card storage rack tucked in beside them. The cane basket has old paperwork which is probably mostly trash by now.

    6. I almost forgot the last corner of the room. I have various supplies in the chest of drawers. The pink thing in the back corner is our hurricane cart (which sorely needs a complete redo before July), and the stuff on the floor is household paperwork. The brown chair is for guests to sit on when John works on their computer, and for the cats to use as a step up to my desk if they don't feel like jumping that high. Scouty tends to 'miss' her jumps when the desk is crowded, and if she's fallen to the floor once she doesn't want to try again that day! If you turn to your right you can just see the corner of John's desk. Right now his working space is MUCH cleaner and tidier than mine and he's putting me to shame.

    So there you have it... the before photos. And as I get it tidied, I'll take the 'afters'...
    Sunday, April 18, 2010

    Catching Up again

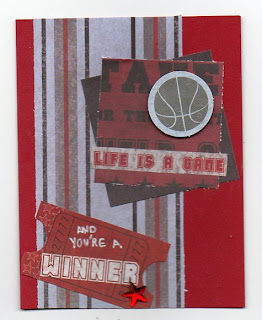
    These two cards are about as far from my usual style as you can get... I picked up a couple of 'scrap packs' and paper stacks at the discount store yesterday. I tend to buy this stuff and stash it away and never actually use it, so I decided to use one of the packs for today's challenges. Teenage boys and young men need cards too, and I need to try to think outside my 'pretty-pretty' box! Everything on these two cards is from the kit except the bling.

    The first card is for S&S Sketch Challenge #12 - last weekend's Stars and Stamps sketch. I'm too late to get it into the slideshow, but not too late to post it! Here's the sketch.

    And here's my take on it. I took a few liberties with the sketch because the game ticket just seemed to belong there. I need a new paper-trimmer - it tends to make ragged edges instead of nice smooth cuts and I have to trim everything down again with scissors if I want it to be neat, but for this card I think that's an advantage.

    My second card is for 365 Cards last white-space challenge, Day 48. It's been fun, but very challenging, to do all these white-space cards. I don't usually use a lot of negative space, and it's hard to think SIMPLE instead of complex! But I love the end results, so it's been a great week.

    The embellishment on the base of my card came pre-made in the kit, and I kept the top part pretty simple and used some blingy stars to echo it. It still looks like it needs something on the top arrow to me, but I'm not sure what!