Sunday, March 27, 2011

365 Cards - Alphabet Week cont.

Day 24 - Marker, Number, Orange
Day 25 - Polka dots, Quilting, Red

This isn't really as red as it looks... the frame is actually burgandy. I'm not entirely happy with how it came out. It looks like it needs something... but i have no idea what.
Day 26 - Stitching, Toile, White
The white paper is kind of toile, and of course entirely white. I adore this paper, and it's always hard to find a good way to feature it. I was going to use a toile-print ribbon but it clashed with the stitching colour, so I used a strip of toile paper and a skinny blue ribbon instead. It's not as elegant as I had in mind, but it's acceptable.

Wednesday, March 23, 2011

365 Cards, Week 4 - Alphabet Week

For Alphabet week you get three things each day - use at least one on your card.

Day 21 -  Alphabet stickers, Blue, Circle

I went simple on this card. The green and purple circle was a RAK - it was a bit TOO plain so I added the silver decoration around the outside. Then I outlined the lettering with the same pen. It kind of worked out the way I wanted... it'll do anyway!

Day 22 - Distressed, Envelope, Fringe
This card is pretty far outside my comfort zone, but I'm pleased with how it came out. I was going to add a purple vellum envelope, but it was just too much of a good thing, so I used punched stars instead.
I tied the eyelash fiber (fringe) around the card, but it looked a little plain so I knotted a pearl buckle into place. Then I added some tiny mother-of-pearl charms knotted onto the ends of the fibers. I put a tiny gluedot behind each star charm to hold them in place and keep them from rattling around in the envelope. btw, I don't know why the star scanned in brown - it's BLACK! And the swirls are metallic silver.

Day 23 - Grossgrain, heart, ink
If you think you've seen this card before it's because you have! When I scanned in my trio of minicards last week I realised that I glued the heart on upside down. Rather than cutting the card apart and remounting it, I turned it into a pocket and stuck a tag in it. The tag was cut freehand from a strip of cardstock and stamped pretty simply.
This card's a three-for. We have polkadot grossgrain ribbon, hearts galore, and plenty of ink on the tag.

365 Cards, Week 4 Sketchy Sunday

Day 20 - Super Sketchy Sunday

I was going to use a printed card someone gave me for this challenge but it's too big to fit on the card base... have to think again!

And here we are. The sentiment was a RAK and I used some nice metallic cardstock and a punch to finish it off. The buttons came off an old tshirt that I just put in the rag bag.The white sticker strip is actually the scrap from another sheet, and the yellow flowers were punched from a piece of scrap cardstock, so this is a heavily recycled card!

Monday, March 21, 2011

365 Cards, Week 3 - day 18/19

I thought I was done for the week but when I looked more closely at the challenge list I forgot to do number 19... oops!

Day 18 is 3x3x3 - make a set of three mini-cards that are 3-inches square.
And Day 19 is 'Crush'. Make a card with a romantic theme. I combined them both together to make this little trio of notelets. The embossed hearts were a RAK from a friend and they're red, not orange. Silly scanner!

365 Cards, Week 3 cont.

I had a very busy week and didn't get these uploaded yet... (and my internet connection is being a BEAR today so I have to do this in very small bites.)

DAY 14 - Fresh-baked Goodness. You get a double-header for this one. These are both made from recycled images... I made a smudge when I stamped the brown, so I added a bunch of light distressing and it covered it all up perfectly. I love how it came out!

DAY 15 - Colour Scheme. 


The card I made is much darker than it looks on the scan. It's not really brown, honest! It was a bit too dark and gloomy when I was done so I added a vellum sticker. I don't really like the way it came out, but the sticker isn't movable so I'm stuck with it! The green is inked, not dirty...


DAY 16 - Abstract Art
I had hoped to have the time to sit down and make a stained-glass window card for this challenge... but I didn't have nearly enough free time! So I went with one of my favourite techniques - the abstract/random background. Just press or drag your card on a multi-coloured ink pad and keep on going until you like the way it looks. The best thing about it is that it will never come out exactly the same way twice. 


DAY 17 - AD INSPIRED (green all the way)

The general idea was to make a St Patty's card today but I didn't have any need for one. So I made a lovely spring green card instead. The caterpillar is cut with my Cricut 'Stretch Your Imagination' cartridge.

Tuesday, March 15, 2011

'Going Dotty'

Stars and Stamps midweek challenge last week was to use polka-dots on your card. Here's one I did for the challenge... the mat is actually metallic pink lips so it's got a bit more zing to it than it looks like here.

Monday, March 14, 2011

365 Cards, Week 3

Oops. I assumed that Sunday was the last day of the week because that's how I think of it... but I just discovered that the 365 Cards calendar counts Sunday as the FIRST day of the week. So I've messed up my card order already. Oh well. I'll do it right from now on. This means that I've already started week 3, and here's the first card.

Day 13 - Super Sketchy Sunday.

And here we are... this is way different from my usual style! I had the diagonal background already done, so I trimmed the corners and added an assortment of stuff that I also had already done. Then I grunged everything up except the butterfly, so I could tie everything together and still keep a strong contrast in the card. btw, the butterfly and flower were cut with my Cricut and the Make the Cut program.

Day 14 - Fresh baked goodness.

365 Cards, Week 2

Okay, week one was completed in an afternoon... now for week 2.

Day 6 - Sketchy Sunday.
(I thought this was Week 1, but I had the weeks messed up so I've moved it to the right spot.
My card looks very simple but it was a LOT more hassle than it looks to get the lace and ribbon lined up properly. The background cardstocks are both textured and glimmery.


Day 7 - Feeling Fierce. I dug out my Safari paper pad for this one, used my pawprint border punch, and a crocodile image that somebody RAKed me. The colours IRL are NOT the same as the scan. It's much more harmonious than it looks here. I decided not to put a sentiment on this one - I'm making more plain cards for OWH than I used to, because I'm not very good at meeting their holiday deadlines.

Day 8 - Arch Card. Use the Arch shape to make whatever card you wish. I cut the card with my colluzzle. It's not really flat on top, the scanner chopped it off.

Day 9 - Do that Decade - the 90s. Make a card that reflects some trend from the 90s. I was almost stumped by this one... everything I could think of was already taken! But then I remembered something. I was a teacher in the late 90s, and one day I walked into a classroom and there was a book sitting on the windowsill. Their teacher was reading it to them and the kids said it was absolutely FANTASTIC. The name? Harry Potter and the Philosopher's Stone! Yep. The Harry Potter saga entered the world in 1997, and it won't really leave until the final movie comes out.


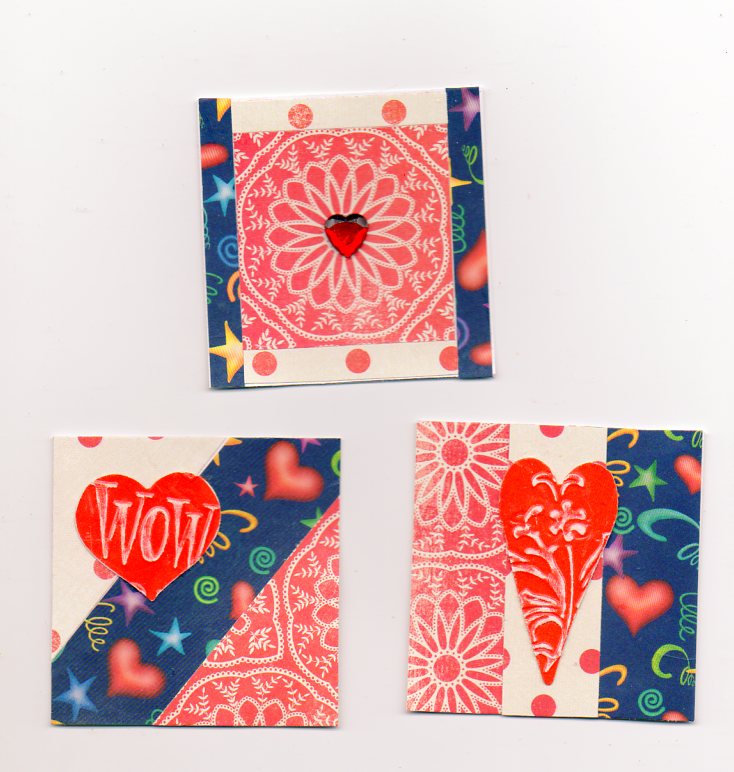
Day 10 - Trendy. Make a card using an item or technique that seems to be particularly trendy just now.
Honestly, I was lost on this one. I don't buy magazines, enter contest, or pay attention to trade shows, so I have NO IDEA what's popular. But everyone else says that pearls and swirls and lace never go out of fashion, so that's what I used. I made the lacy heart frame all by myself using my Make the Cut software. I was going to incorporate some real lace too but it would have been overkill. This card is way busier than anything I usually make already! BTW the embossed heart was a RAK somebody gave me.

Day 11 - Repurposed. Use paper designed for one holiday to make a card for another. This one was easy - I used a sheet of Christmas paper and made a pair of birthday cards with a strip of it.

Day 12 - Keep it Simple. Cover a card with patterned paper (using one or more designs), add ONE sentiment and ONE embellishment. I made this at the same time as the one for Day 7... can you tell? lol One sheet of patterned paper from the Safari pack, my pawprint border punch, a stamped sentiment, and for my embellishment I decided to do something I NEVER do and use eyelash fiber tied right around the card. It blends into the green much better IRL than in the scan.

365 Cards, Week 1

I know I'm late starting... but the 365 card challenge blog just rolled around to the start of a new year, and I've decided to give it another go. Can I make a card a day, every day??? I went back to the first week and started playing catch-up.

DAY 1 - White Space. This is a pretty simple challenge - you have to keep the decoration on your card within the bounds of the sketch, in this case a strip down one edge and a rectangle right at the other. I really don't like a rectangle sticking off the edge of my card, so I adapted it and used a half-circle instead.
DAY 2 - Pick 5. Use the following items on your card:
Your favourite colour - pink
 Favourite design technique - embossing (and border stickers)
Your favourite embellishment - flowers
Least favourite colour for cards - black (unless it's combined with pink or red!)
Favourite card size - standard 5-1/4 s 4-1/2

DAY 3 - Fun with Fabric. Use a piece of fabric to apply ink or paint to your card. I rolled up a scrap of an old tshirt so that the seam was on the outside and used a pastel rainbow pigment ink so it would be nice and juicy. I love how it turned out!

DAY 4 - 'One of a kind'. Pretty straightforward. I printed the sentiment out, and used stamps to demonstrate it.

DAY 5 - Winter and Summer collide. Use both summer and winter on your card. This one puzzled me a bit, but then I remembered a cute stamp I just bought, and I combined it with a bright summery pre-printed card and some tiny snowflake stickers.

Friday, March 4, 2011

Graphics by Fran, card by printer...

There's a very special post on the Stars and Stamps blog today - beautiful art cards by a very special lady. Fran doesn't use stamps or clipart or patterned papers - she draws and colours every one of her cards by hand, and they're amazing! And because she's so special, she gave us some digital art to play with, as long as we're using it for OWH. There are four different clips, so if you don't like the fishy, there are plenty of other choices.

Anyone who's read my blog knows I'm not fond of colouring. Sandy's examples are totally awesome, but I couldn't possibly do justice to Fran's designs if I tried to colour them in myself (you really don't want to see what I did to the poor fishy I tried to draw scales on by hand...) Luckily I don't have to try. I cheated! lol There's another solution that works really well for simple designs with fairly large pieces - I paper-pieced them! NOTE - paper-piecing wouldn't work well on Fran's other images because they're too detailed and you'd go barmy trying to cut and reassemble all those fiddly little bits, so I chose the fishy by default. Besides, he's CUTE!
So how do you do paper-piece a piece of clipart? Easy peasy! I printed the art out on four different coloured sheets of paper, and then I cut out the bits I wanted and assembled them on top of the blue background. I had to cut the yellow fish right out of the sheet to get the fins and lips, so I used the other parts on a second card - this time I just glued the yellow on top of the white sheet and coloured in the background with a pale blue marker. There's still enough bits left to do a purple fish with lavender lettering, but two was enough to give you the idea.