Tuesday, May 17, 2011

Cards... at last!

We were both sick for three weeks so I didn't make any cards for a long time. This week I got a surprise package of rubber stamps, and I had a play with them. I've never used large background stamps before and I didn't have any luck in stamping them. I was about to give up in despair when I thought of using the Bigshot to compress them. They didn't fit in with the white backing, but I have a felt piercing mat that was just the right thickness to make up a sandwich - I used the clear mats on the outside, the black embossing mat and black plastic pad, and my felt piercing mat with the stamp and cardstock in the middle and when you added them altogether I got a perfect image! I tried it with a few other stamps and it didn't work so well - they were too thin still. But it worked great with the full-sized background stamps that I was just given.

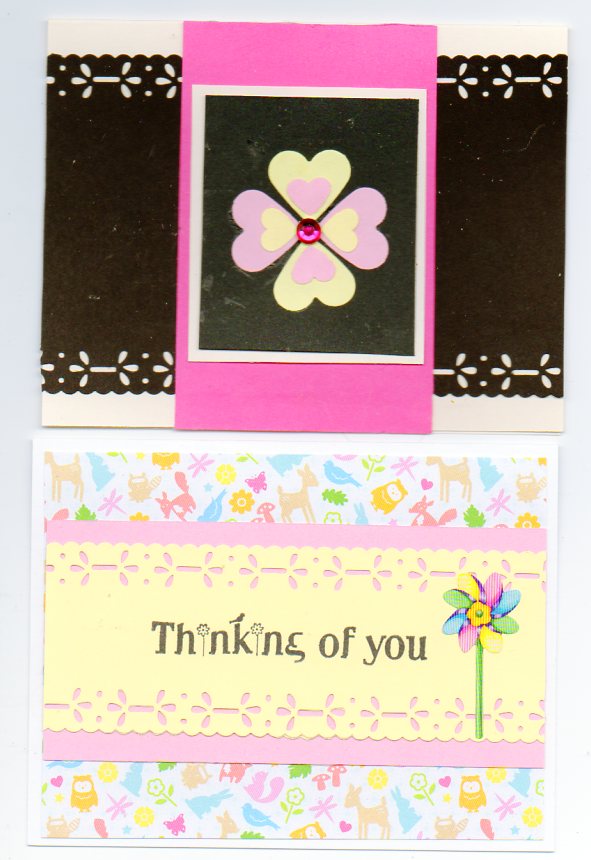
Here are the cards I made... I finished them with some gorgeous diecuts I got on clearance at Michaels last month. They're so cute that I wish I'd bought more packets! The 'brown' is actually gorgeous metallic copper on acetate and it makes wonderful cards. I love metallics! The flowers have glitter on them but that's okay - I just can't send them to Operation Write Home. I want to make some cards for church and that's a start. There are two skills I have that are of value to other people - cooking/baking, and making stuff... I need to stop worrying about what other people might thing and use them.


Wednesday, April 27, 2011

My new toy

This is what came in the mail on Friday...
My first embossing templates arrived today... and I played with one this afternoon to see what it could do.

My first card. Simple embossed strips. The black and purple are punched but not embossed. Butterfly was a RAK. It would work out better if the card front was assembled and THEN embossed so that the pattern is continuous, but this looked okay with the other stuff on top of it.


I embossed a cardstock shield, then flipped the embossing over and inked up the reverse. I think I like it better this way than with the lines coloured! It needed a see-through sentiment that wouldn't distract from the embossing, so I used clear lettering stickers.

=
Embossed directly on a card base with a coloured outside and white inside, then sanded. I had to trim the edges down to neaten it, but the sanding hides the face that the embossing doesn't quite go all the way to the inside edge.

Monday, April 25, 2011

I made some cards this week

My shoulder is finally better for real and I've been able to start making cards again. I designed a simple MOM card for the kids to make at the library and I spread the lettering out on the sheet so that I could use the negative space for myself. I've got another 18 in various colours still waiting to be used! If you're wondering about the butterfly, it's a lovely metallic sticker. I finangled some scrap cardstock into little hinges for the wings, and then I rubbed cornstarch on the back so that the sticker wouldn't stick to the card in the mailing box. The other cards are playing with simple punched shapes and scrap cardstock.


Tuesday, April 5, 2011

365 cards again

My shoulder's better now, so I was going to do a catch-up and get all last week's cards done in one go, but they've changed Mr Linky and they're only keeping posts open for a week instead of a month like they used to. I guess I'll just start from Sunday and skip last week altogether, but my perfectionist streak is shouting at me about incompleteness. :( Cards coming today!

***
On the other hand, not. I thought I was up to cardmaking but I got one done and I was trying to do a second and my shoulder started screeching at me, and the card didn't even work out! This is soooo frustrating!

Friday, April 1, 2011

So much for trying to do 365 cards!

Last year I was just getting started when I had to stop because I'd messed up my wrist/thumb and I had to take three months off crafting entirely so it could heal. This year I was going great... and last Saturday night I rolled over in bed and trashed my shoulder. So I can't make cards because I can't manage all the lifting and reaching it requires. I took this week off and it's halfway healed. I really hope that another week will be enough to fix it entirely, or I'll have to give up AGAIN!

Sunday, March 27, 2011

365 Cards - Alphabet Week cont.

Day 24 - Marker, Number, Orange
Day 25 - Polka dots, Quilting, Red

This isn't really as red as it looks... the frame is actually burgandy. I'm not entirely happy with how it came out. It looks like it needs something... but i have no idea what.
Day 26 - Stitching, Toile, White
The white paper is kind of toile, and of course entirely white. I adore this paper, and it's always hard to find a good way to feature it. I was going to use a toile-print ribbon but it clashed with the stitching colour, so I used a strip of toile paper and a skinny blue ribbon instead. It's not as elegant as I had in mind, but it's acceptable.

Wednesday, March 23, 2011

365 Cards, Week 4 - Alphabet Week

For Alphabet week you get three things each day - use at least one on your card.

Day 21 -  Alphabet stickers, Blue, Circle

I went simple on this card. The green and purple circle was a RAK - it was a bit TOO plain so I added the silver decoration around the outside. Then I outlined the lettering with the same pen. It kind of worked out the way I wanted... it'll do anyway!

Day 22 - Distressed, Envelope, Fringe
This card is pretty far outside my comfort zone, but I'm pleased with how it came out. I was going to add a purple vellum envelope, but it was just too much of a good thing, so I used punched stars instead.
I tied the eyelash fiber (fringe) around the card, but it looked a little plain so I knotted a pearl buckle into place. Then I added some tiny mother-of-pearl charms knotted onto the ends of the fibers. I put a tiny gluedot behind each star charm to hold them in place and keep them from rattling around in the envelope. btw, I don't know why the star scanned in brown - it's BLACK! And the swirls are metallic silver.

Day 23 - Grossgrain, heart, ink
If you think you've seen this card before it's because you have! When I scanned in my trio of minicards last week I realised that I glued the heart on upside down. Rather than cutting the card apart and remounting it, I turned it into a pocket and stuck a tag in it. The tag was cut freehand from a strip of cardstock and stamped pretty simply.
This card's a three-for. We have polkadot grossgrain ribbon, hearts galore, and plenty of ink on the tag.