Showing posts with label cards. Show all posts

Sunday, December 4, 2011

More cards for sale

Last week I sold all of the gift boxes and 10 general greeting cards, and I made $50 for the church because the guy who bought all the envelopes was so generous he gave me $40 and wouldn't take change... and I have four people who told me that they will definitely be buying some today. So I sat down and made some more (after I went out and spent $10 buying some more glue! The ATG tape runner made 50 cards and expired.) I also bought a new Christian sentiment stamp on sale for four bucks. I think I'll get a lot of use out of it, especially if I keep on selling cards at the church. Right now I'm thinking that I'll repeat the card sales for each holiday that comes up and see how it goes.

In other news, I've ordered my christmas present online - I really wanted to get a $400 Zing cutting machine... but somebody put the Cricut Cake machines on sale for $50 each with two cartridges included, and I'm assured by people who have already bought one that yes, you can use it for paper if you change out the cutting blade for a 'paper' one instead and buy a sticky mat (the frosting mat is nonstick). Even with the extra cost of the  mats and blade, it's less than $100 for a machine that can cut 12x24 (the one I've got now only does 5.5x11.5) I'm so excited!


Sunday, November 27, 2011

Christmas Cards for sale

Don't die of shock. I crafted! I've made 50 Christmas cards and 14 card-sized gift boxes to sell for a fund-raiser for my church. The gift boxes are easy once you figure out where to make the score lines... Want to buy any? Cards are $1 each, and if you buy 10 I'll throw in a free gift box.

We were challenged to use only $3 each for supplies for whatever we made/bought/came up with as our fund-raiser. I had $6 to play with because John gave me his. Cardstock is regularly going on sale at Joanns for $2 a pack, and the tape runner I use on my cards costs $3 each. I cut a few decorations with my Cricut, but most of them are punched or stamped. Miss Jo over at the library gave me a whole box of beautiful big Christmas stamps a few months ago, and they were a huge blessing for this project! I didn't use any bought papers - they were all either things people had given me, or I pulled them out of my scrap drawers. It was a real challenge to get into the swing of making cards with stamps and paper rather than all the fancy stickers and embellishments I reach for when cost is not an issue! But I'm very pleased with how they came out when I look at them together.
PS. If you're wondering where the envys came from (they're the most expensive part of a lot of cards), I got a huge stack of Hallmark envelopes for $2 at the thrift store last year. I probably got 500 envys for my $2. That makes them how much each? About 1/4 of a cent! lol These cards haven't even started to make a dent in the pile.

A mixed bag. Cards at the top are cut with my Cricut.

Poinsettias - this was a stamp that I cut out, with punched leaves behind it. I love the way it comes out.

Some traditional holly

Angels/Christian cards

Florida snowmen?

Gift Boxes

Sunday, August 14, 2011

Monogrammed notelets and a quick tutorial

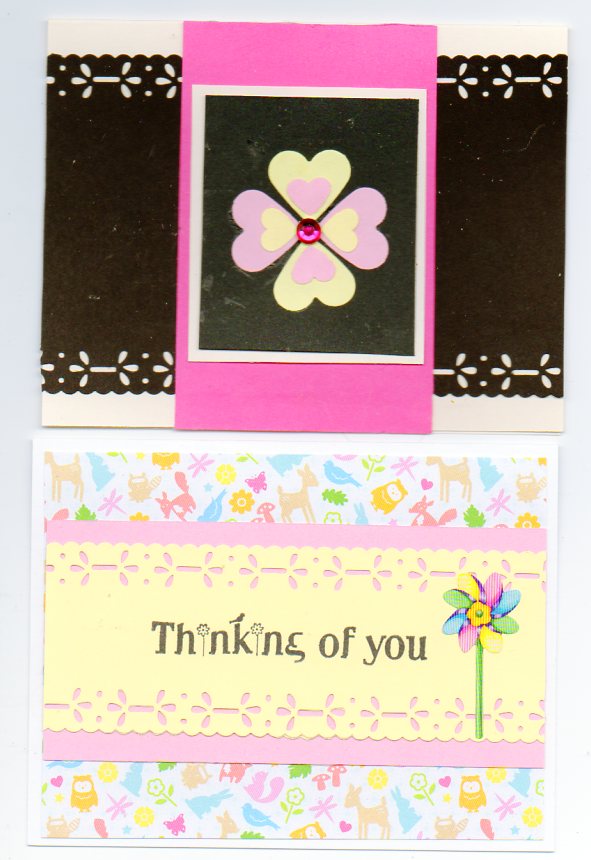
One of the ladies at church wanted me to make her a set of monogrammed notelets, so I took the challenge on with my Cricut. I showed her a few samples last week and she chose the background and floral border punch, and asked me to put a relatively simple monogram in the center.

I wanted to do a classic oval monogram with her last initial in the middle and larger, but I couldn't make it work out the way I wanted it to, so I switched to the more modern rectangular format. But that was too plain, so I made a floral accent for the frame to spiff it up a bit. If she likes these, I have another dozen card bases prepped and waiting for their monogram. The hardest part of the challenge was finding an appropriate alphabet for the lettering. I wanted it to be curly and to SEEM ornate, but if the lines are too delicate or intricate the Cricut won't cut it without tearing the paper. The vine on the frame is really as fine as the Cricut can go. But I was very happy with it in the end, and I hope that Judy is too!
PS. Want to make the simple folder? It's dead easy - just take a regular sheet of cardstock and a scoring tool (I used a bone folder and a metal ruler.) Score the cardstock about two inches from the bottom, then score vertically in the center - but don't forget to do TWO lines so that your little folder will have a spine. Fold the bottom up and fasten the two ends of the flap into a pocket (I just used green staples), and use a hole punch to make small holes further up the cardstock on either side of the spine and on the outside of the card. 

Thread a ribbon through the holes and it will serve to hold the contents in place and to fasten the folder closed at the same time. This folder will hold a dozen flat cards and envelopes if you use an 8-1/2x11 base. If you want make your folder thicker, you'll need to use a larger sheet of cardstock and trim it down to the height you need.

Saturday, May 21, 2011

More brown cards

I know it's not Autumn yet, but I love the browny vintage colours, even if I never make fussy lacy cards!
Martha Stewart border punch $4 at Ross! Butterfly is a metal charm, and sentiments are from a printed sheet.

Trying out my texture plates. Top card uses a diecut.

And just so you know that I don't ALWAYS make brown cards here's a couple of oddments with my new border punch.

Monday, April 25, 2011

I made some cards this week

My shoulder is finally better for real and I've been able to start making cards again. I designed a simple MOM card for the kids to make at the library and I spread the lettering out on the sheet so that I could use the negative space for myself. I've got another 18 in various colours still waiting to be used! If you're wondering about the butterfly, it's a lovely metallic sticker. I finangled some scrap cardstock into little hinges for the wings, and then I rubbed cornstarch on the back so that the sticker wouldn't stick to the card in the mailing box. The other cards are playing with simple punched shapes and scrap cardstock.